

Wilko’s Big Gear List
I’ve been hiking for a few years now and by no means would I call myself an expert. I still make silly mistakes but I always try to learn from them.
It’s through these mistakes and successes that I’ve come to understand what I do, and most importantly, do not need when I go hiking. It can be a fine line between carrying a heap of heavy gear you didn’t need and at the worst not returning home because you didn’t have the right gear.
If you’re into hiking and wilderness photography in Tassie it means you’re up for 4 season weather patters. We get it all down here, very hot summers with high UV through to freezing winters. I love winter because of the mood and colours. There’s something about wet forest with high contrast and vibrant greens or moody misty days with gray skies and snow that appeals to me. The thing is, each season requires different types of equipment to ensure you are comfortable and safe, especially winter.


Hiking requires a solid investment in equipment to make sure you survive. Sure, some will head out on occasion and get away without the right gear but Tasmanian winters can be dangerous. Our weather can change in an instant and if you’re caught in the cold, wet, snow, sleet, wind or lightning and you do not have the right equipment you can die. It might sound a bit dramatic but the reality is people get rescued every year and sadly people do perish, it must be a terrible way to go.
I post lots of winter pics and get enquiries from people asking how they get to certain locations. Sometimes I share the details but I always ask about a persons experience and the equipment they plan on taking. The answers I receive worry me at times and It’s my hope with writing this article that I provide some help and and awareness of what is required if you want to venture into the wild places in wild weather. Let me stress, you MUST be prepared if you want to head into the wild places during winter and you should ALWAYS CARRY A PERSONAL LOCATOR BEACON (PLB). Shit goes wrong very quick no matter how experienced you are and if you need help a small investment in one of these is essential. I don’t want to sound like a wanker and the purpose of writing this is to help educate people, not to try and look like I know it all. Please pay a healthy respect to the dangers of nature when you go off grid. The gear I have listed below keeps me as comfortable as possible and helps me come back to the people I love, do your own research and use this as a guide only.
You’ll notice that it focuses on winter and colder temperatures. That’s not to say walking in the heat isn’t dangerous, bloody oath it is so take care, keep covered, slip slop slap and keep hydrated is my advice.
I found the next section online and it explains things in a good level of detail, better than I could anyway. This stuff is very important so take the time to understand it before you purchase anything.
First things first - understand breathability, windproof and waterproof ratings
Waterproof fabrics are resistant to water penetration. This is typically done using a membrane or a coating that act as a barrier, preventing moisture from permeating the fabric, keeping you dry and comfortable.
Breathable fabrics allow sweat in the form of water vapour to escape from the inside of the fabric to the outside.
Whilst it is common for a fabric to be waterproof and breathable, there are different variations so some fabrics may prioritise certain properties over others. Some fabrics may be more waterproof and some fabrics may be more breathable to cater for the kind of activity that you are trying to do.
A waterproof and breathable jacket is essential but finding the right one for you isn't always so simple.
What do the numbers mean?
Waterproofness Ratings:
5,000mm: This is the minimum rating for a jacket to be called rainproof, however, it won’t stand up to much more than a light shower.
10,000mm – 15,000mm: A jacket in this range will withstand most downpours as well as heavy snow, but will soak through over time if subjected to pressure, such as crashing in wet snow, kneeling or sitting down, or a heavy pack.
20,000mm and Up: This is the rating you should look for if you plan to be out in all conditions carrying a heavy load.
Breathability Ratings:
5,000 – 10,000g/m²: This level of breathability is fine for urban travel or camping in the rain, but will get a bit clammy during high-intensity hiking.
10,000 – 15,000g/m²: Jackets in this range are suited to more adventurous travel or backcountry hiking but breaking trail through snow or heavy rain might prove too much.
15,000 – 20,000g/m² & above: An extended trip to the hills, trekking in warm climates or otherwise working hard and perspiring heavily will require a jacket this breathable.
Can gear be fully waterproof?
Although fabrics can be fully waterproof, such as rubber and wax, outwear for active sports will usually be varying degrees of water-resistant, as with enough water, wear, and pressure, it will eventually leak.
It is important active outerwear retains an element of breathability, otherwise, you’ll keep the water out but soon be wet from your own perspiration. As a result, most outwear balances protection with breathability.
How does it work?
Waterproof fabrics have two or three layers: an outer layer, a membrane and a tri-coat mesh.
The Outer Layer: Also known as a ‘face fabric’, this is made of nylon or polyester. Its main roles are to provide initial protection from the elements and look stylish. It is normally treated with DWR so it is water resistant. This is not the same as waterproof, think of it as the first line of defence against water as it will help prevent fabric saturation.
The Membrane: This is where the magic happens. These are typically made of Teflon (ePTFE), which have small holes that stop water getting in but allow water vapour out. ePTFE membranes can become less effective at keeping out water if they are contaminated by oil or sweat so now they are coated with a Polyurethane (PU) membrane or another oleophobic coating.
Inner layer: Finally, the 2-layer laminate (outer layer + membrane) is bound to a mesh. The mesh increases the breathability of the fabric and protects the membrane. Mesh can be used impacts the classification of the fabric, 2-layer fabrics will have a mesh or loose fabric lining whereas 3-layer fabrics will have a more lightweight mesh. The main difference is in its breathability, fit and price. 2-layers are bulkier and less breathable but cheaper. 3 layers tend to be more durable and breathable but are more expensive.
Construction Types
Sitting alongside their waterproof and breathability ratings, these fabrics are also typically classed in layers; either 2 layer, 2.5 layer, or 3 layer, often abbreviated to L.
2 LAYER - 2-layer will have a face fabric bonded to the waterproof/breathable laminate with a hanging liner to protect the membrane. The hanging liner isn’t glued or bonded to the membrane meaning it has a looser fit and can be a bit bulky. As there are only two layers it is very flexible and comfortable. It is also cheapest out of the waterproof constructions but this does mean you will compromise on breathability, durability and protection.
2.5 LAYER - Like the 2-layer it will have a face fabric and a waterproof/breathable membrane but will have a partially bonded inner liner. This is the most lightweight option and is cheaper than the 3-layer, but it won’t be as breathable or durable.
3 LAYER - This has all the layers, outer layer, membrane and a fully bonded inner layer. The membrane is fully sandwiched so it is completely protected, meaning it will last longer and provide more protection. As it is more durable they tend to more expensive and the 3-layer construction means it is bulkier. This is the most advanced construction offering a protective, lightweight, durable, and most importantly breathable fabric, but it is more expensive.
Things to look out for
1. Seam sealing: When clothes are sewn together the needle makes tiny holes, which water could leak through. To stop this from happening the seams are “taped over” with waterproof tape. They can either be fully or critically taped, so all the seams are taped or just the most exposed areas.
2. DWR: Durable Water Repellent is usually applied to exterior fabrics for extra waterproofing. It may become less effective over time but it is still a useful feature to look for as it provides you with an extra level of protection.
3. Fabric care: Different membranes have different care instructions. Some membranes like GORE-TEX have easier care instructions, whereas others have more complicated care procedures to maintain the waterproofing.
4. Brand: There are many kinds of membranes, from GORE-TEX to eVent to brand specific membranes by Marmot, North Face and Mountain Hardwear. These different membranes will be better for different things and have different testing standards. Generally, whilst both are waterproof and breathable GORE-TEX is warmer and easier to care for, whilst eVent is more breathable but will require more reproofing/maintenance.
So what should I get?
Depending on the conditions, activity and personal preference the right waterproof jacket for you will vary.
If you need a good all-season all-rounder for activities like walking then a softshell will serve you well. Bridging the gap between fleeces and waterproof jackets (or hardshells) softshells offer water resistance, breathability and warmth at a fraction of the price. Whether you need a lightweight outer layer or a breathable mid-layer softshells are the perfect in-between for your outdoor adventures.
If you are going to be outside in more extreme conditions, for instance, longer and more exposed hikes, then a hardshell with increased waterproof capabilities is your best bet. This will use a 3-layer construction with a durable face fabric that will be very resilient in a wide range of conditions.
I prefer the later option because it gives me coverage for all conditions. 1 jacket to rule them all.
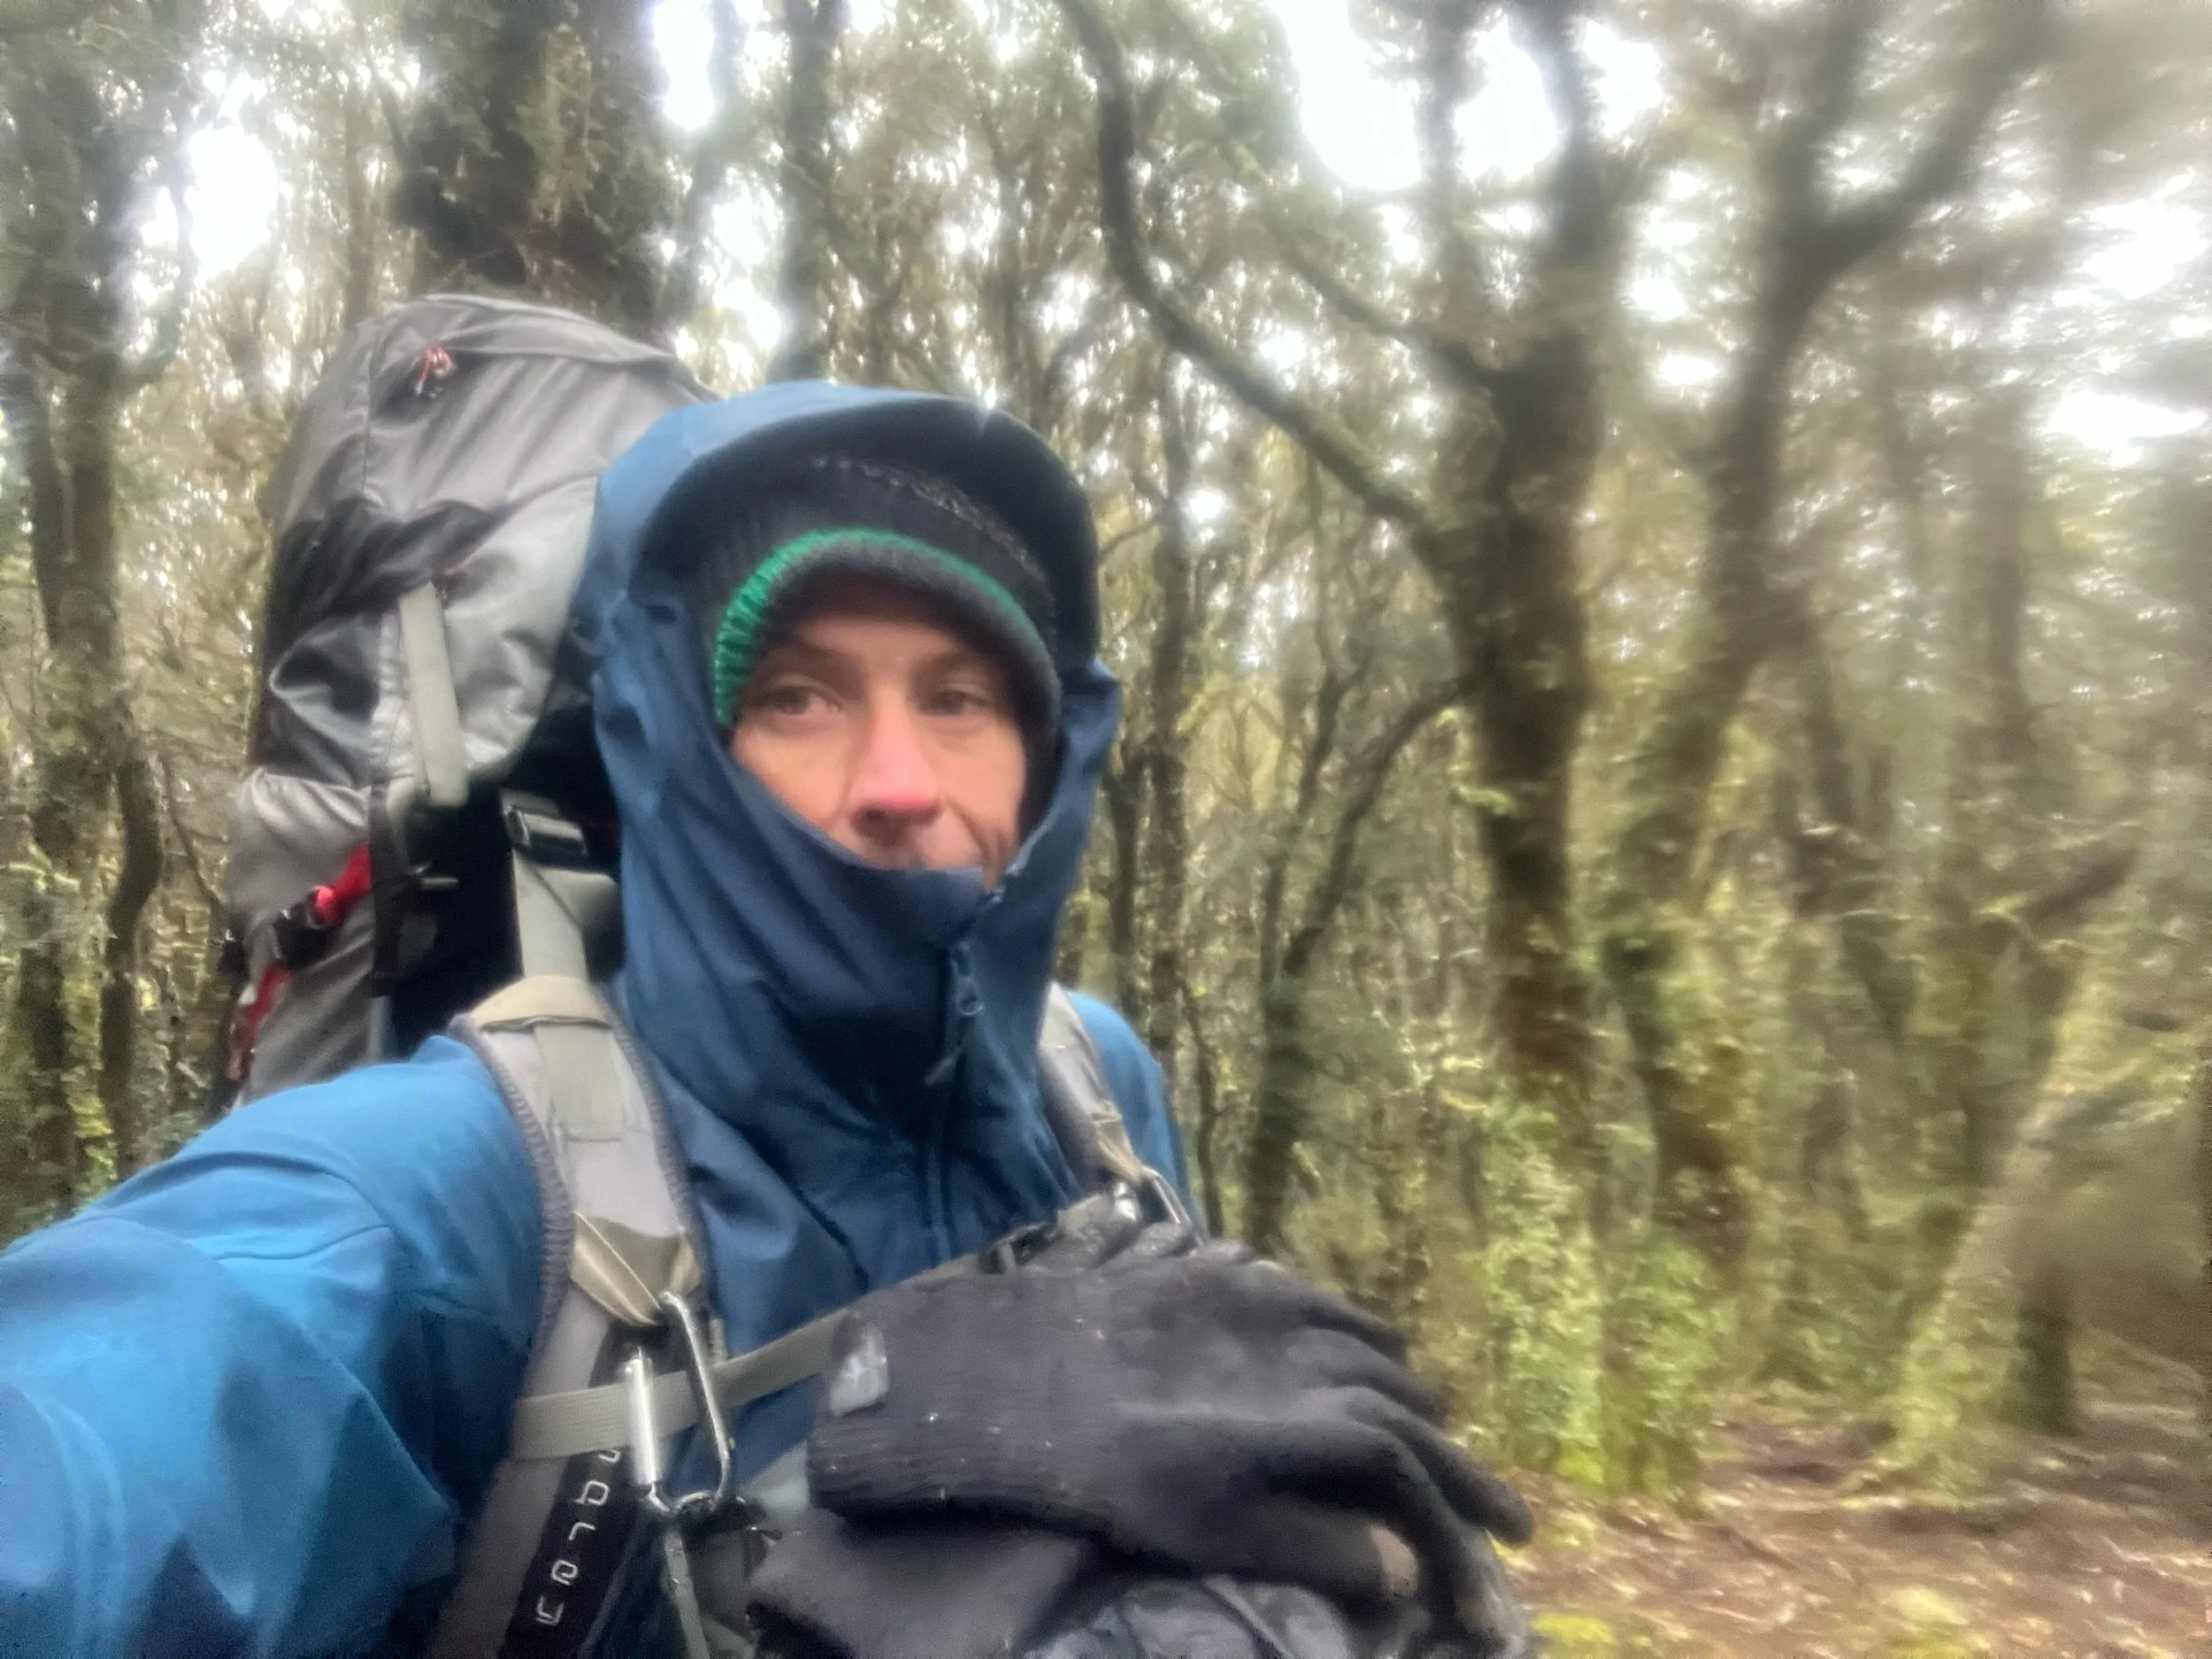
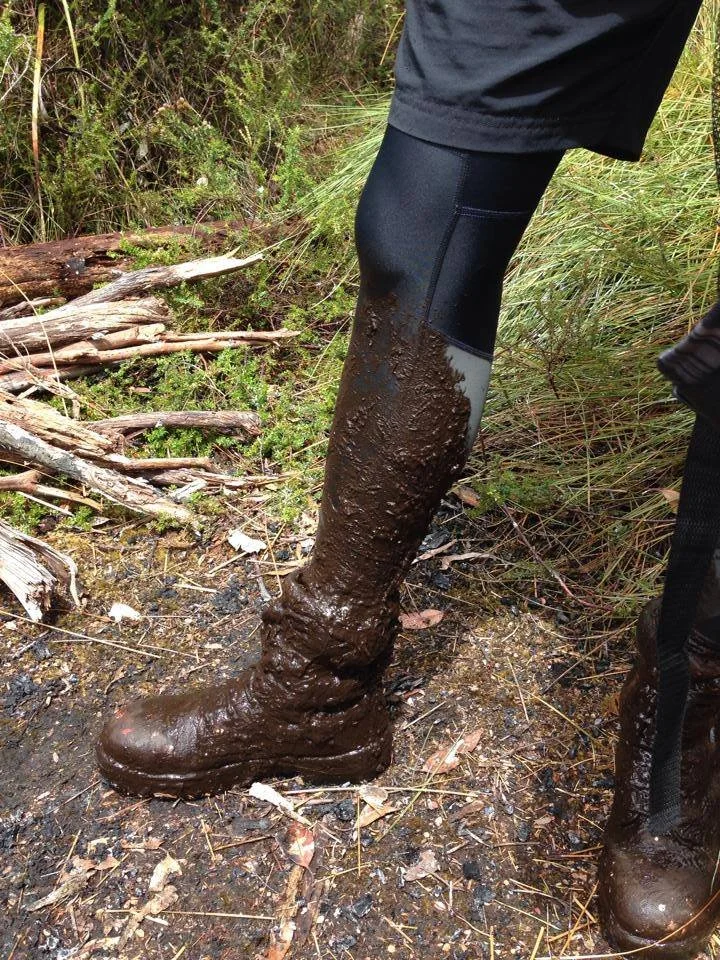
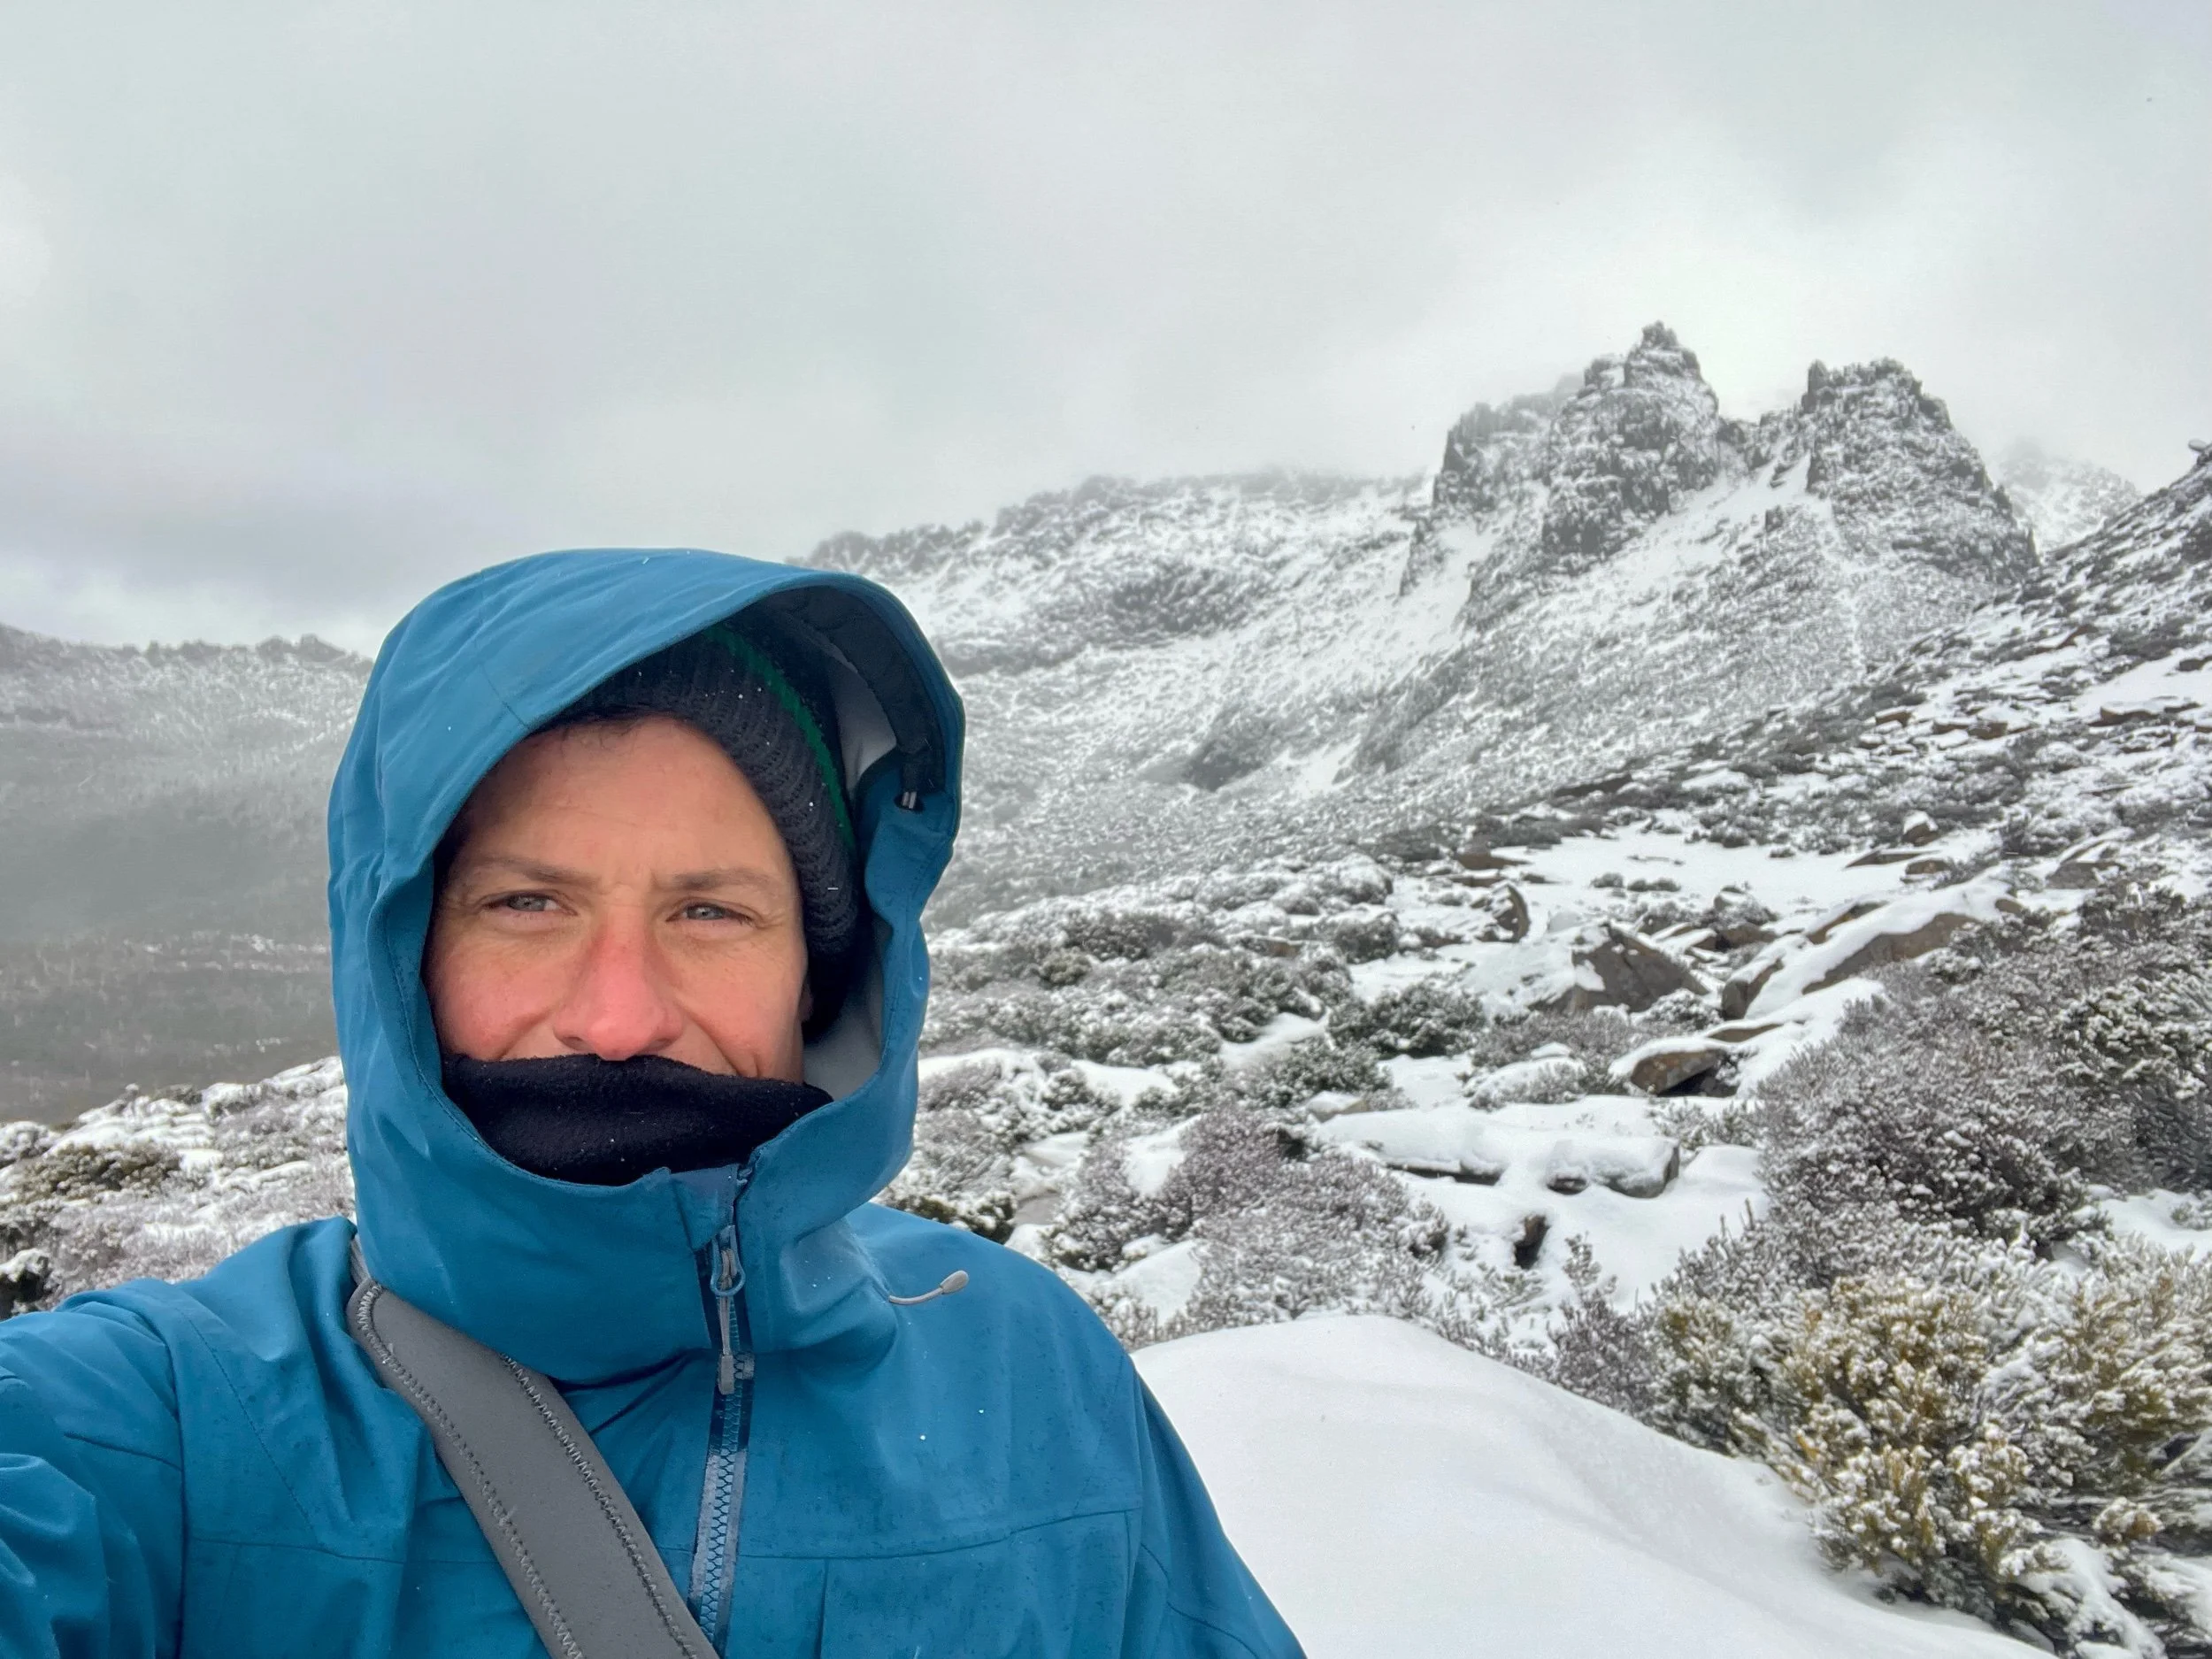
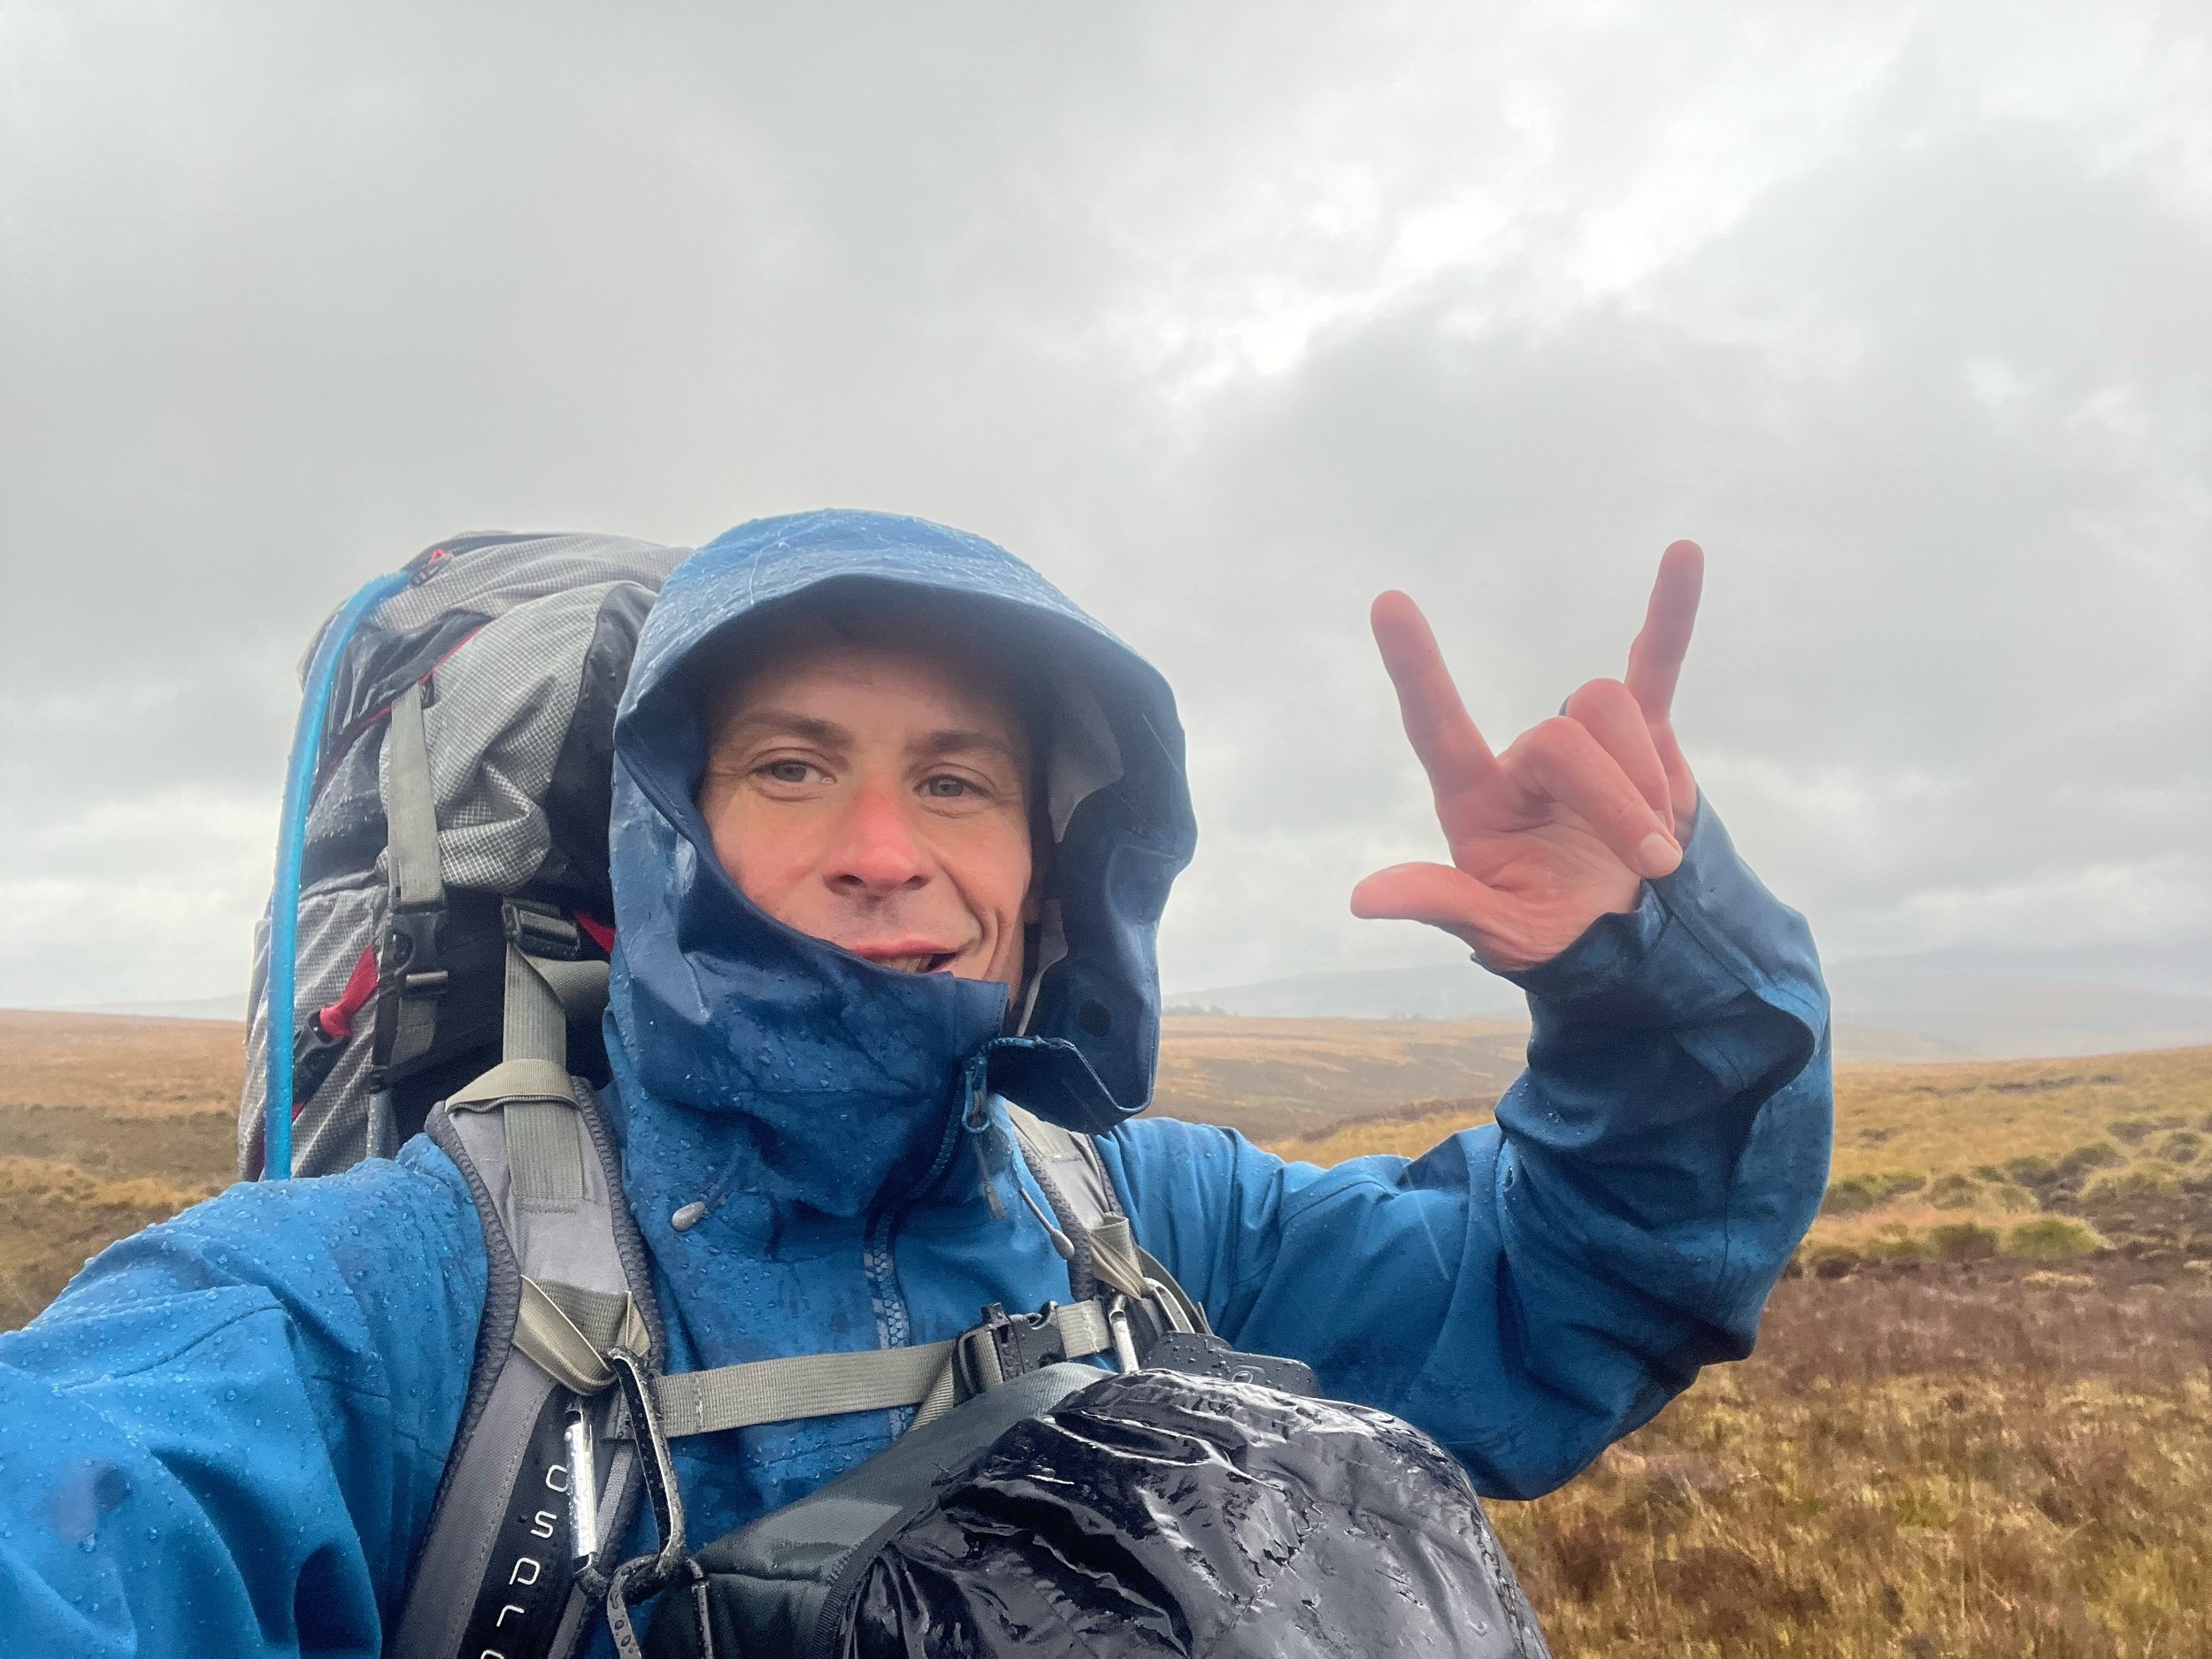
Here I am below, these were taken in the same day. The pic on the right shows me absolutely soaked and the pic on the left shows me in an almost dry flannie after 6ish hrs in the rainforest. The clothing from waist down was drenched.
Note the gaijters on the outside of my wet weather pants. Omg what a fail and not the first time I’ve done it. Hot tip, wear the gaijters underneath so the water runs straight off your pants rather than getting trapped and soaking through.


The Gear List.
Shelter
Tent - The Mont Moondance FN 1
Shelter, so damn important. Tents are very expensive and there is a lot to consider. I did a full review of this tent here. It’s a superb 1 man, lightweight (1.7kg), 3 seasons tent and I am very happy with it. I researched a lot of tents and this one suits me and the Tasmanian conditions well. It looks great too!
If you’re going to invest in a tent for hiking in Tasmania I recommend nothing below a 3 season rating and possibly above depending on the conditions.
After speaking with a very knowledgeable friend of mine, Nicole Anderson she also adds ‘I’d strongly recommend 4 season tents for people going into winter alpine areas - reason being is wind resistance capability. However the caveat is the pitching of any tent can mean the difference & skill of the hiker in reading the terrain, wind & weather can make or break almost anything.’
Do some research on how to pitch a tent in different conditions. I’ve been in my tent on the Western Arthur’s once before, spread eagled holding it to the ground in a big storm. The pegs held and it didn’t break but I was damn glad I’d set it up properly because if it had of come loose and folded in on me in that weather, holy shit!! Worth noting is the storm started after I went to bed and wasn’t expected. That was a wild night.
A ground tarp can be a great investment as well. Check the rating on your tents tub (floor), these also have a waterproof limit and it pays to make sure yours will hold up next time you set it up in the rain.
Let’s face it, there’s only a couple of moths a year the ground will be dry in Tasmania so if I were you I’d want to know the floor of my tent will keep my dry. Waking up in a puddle isn’t nice!


Tarp & Bivvy - I have a tarp that rarely gets used but it doubles as a ground sheet for winter and I pack it for ‘just in case moments’. My bivvy is an old army one that I picked up on marketplace. I use this for sleeping outdoors in warmer months when a tent is overkill. It isn’t used for hiking because condensaton can wreak havoc with your sleeping bag. Tassie isn’t dry enough for me to invest in a high quality bivvy and when my tent only weighs the same as a good bivvy I’d prefer the safety, dryness, comfort and room my tent offers.
Pack
Pack - Osprey Aether Pro 70L When you load up for a big hike and are carrying 20-30kg for 8-9hrs a day it doesn’t take long to realise if your pack is going to hurt you. Shoulder and waist straps can get real nasty after a big day and if you get chafe you’ll know about it. The big reason I chose this pack over a few others I tested was the harness system. The waist belt is very comfortable and when I cinch it and the shoulder straps tight it feels like that thing is glued to my back. The waist pockets are really big, I was able to fit 6 cans of beer in there once (don’t judge, gotta keep the fluids up!)
At 70L it can be a challenge to get everything packed for trips longer than 3 nights. It only weighs 1.7-1.8 kg and is made of a tough water resistant material.
Here’s the closer though - Osprey have a thing called the ‘All Mighty Guarantee’ - From their website ‘Osprey will repair any damage or defect for any reason free of charge — whether it was produced in 1974 or yesterday. If we are unable to perform a functional repair on your pack, we will happily replace it. We proudly stand behind this guarantee, so much so that it bears the signature of company founder and head designer, Mike Pfotenhauer.’
In my books, that’s the gold standard of a company I want to purchase my outdoor gear from.


Drysacs - these go inside your pack and offer another layer of protection from water. You’ll need these, water will get into your pack and if your clothes and sleeping bag get wet you’re in trouble. They can also help keep your gear seperate and organised, I have one for food, one for clothes, one for sleeping and shelter and one for other stuff. When I get to camp I can easily find what I want and don’t end up with stuff being laid out everywhere while I try to find what I need.
They do come in varying degrees of waterproofing so make sure you get the highest rating, otherwise what’s the use? I went the cheaper option before I understood the numbers and my stuff got damp but not wet so I ended up having to pay for new ones. By trying to save money it cost me more in the long run.
Sleeping System
You will need a solid setup to keep comfortable at night and there are a few things that go into making your bed when you’re outdoors. Having a very warm sleeping bag or quilt means that you are sorted for winter, when summer comes you can just unzip it and Bobs your uncle. The big thing to understand is that no matter how good your sleeping bag is, if it’s cold you MUST have a good sleeping mat otherwise all your heat will be lost through the ground. Ground insulation is extremely important, when you make a decision on your mat make sure you look at the R rating.
Technically speaking, an R-value measures how well an object resists heat (hence the “R”) The higher the R-value of a sleeping pad, the greater it will resist heat transfer and keep you insulated from the ground. R-values for sleeping pads usually range from around 1 to 7.
Sleeping Bag - When I first started hiking I purchased a Kathmandu Pacesetter, Water Repellant, Mummy Down Sleeping Bag. That was a long time ago and I still use it all the time, it’s my go to bag when things are cold. I don’t think they sell them anymore but it has kept me warm for many years.
Quilts - Hand made in Tasmania by Tier Gear, these are the bomb. Custom made to your request, Tier Gear quilts are super lightweight and very comfortable. The fact that it packs down to half the size and weight of my sleeping bag is fantastic. Bags are so uncomfortable once you’ve tried a quilt, because you’re under the quilt rather than wrapped in it makes a huge difference for me. I can toss and turn all night long in a quilt without getting tied up like I do in my bag. However, I do not use my quilt in temps below zero and up to 5 degrees because I like the benefits of a sleeping bag, anything above that and I always pack my quilt. Have a look at their website and do some research. Tier Gear quilts are worth the investment.


Sleeping mat - I use the Exped Ultra 5R 4 season and I really like it. At 585g it weighs a little more than some others but isn’t overly heavy plus it isnt made of that annoying metallic material that makes a hell of a noise every time you roll over. The extra weight gets me a bigger mat, more air in the baffles and a warmer nights sleep. I have the synthetic one which I prefer over the down because when, not if, down gets wet you’re in trouble and loose all your thermals. Synthetics handle moisture a little better. When you’re sleeping on the ground in a tent and its wet and cold, moisture will be getting onto your mat so be prepared.
Pillow - oh boy this is a hard one and I’ve gone through a few before settling on my current system. I have to admit that I still haven’t perfected it yet but I’m fussy when it comes to sleeping. I have 2 pillows, the Sea To Summit Aeros Premium & the Sea To Summit Foam Core I have the big one on the base and the inflatable on top of that. It comes down to what you’re used to at home. Out of the 4/5 pillows I’ve tried, these are the best. The big one takes up a bit of space in my pack but it affords me that bit of luxury I need.
HOT TIP - from Matt Green, a friend of mine who is the gear guru and master of camp beds.
Looking up how to fasten your pillow to the air mattress. Matt uses elastic rapped around the pillow and mattress, I tried it and it works a treat. One sure way to have a frustrating night without much rest is your pillow slipping off the air mattress all night.
Get a luxe sheet to cover your air mattress. Like the name suggests, this will be luxe and make you the envy of your friends.
Matt also recommends Lighterpack.com which is a website you can use to track your gear, keep an eye on weight and make sure you never forget anything.
Clothing
I don’t care how waterproof something says it is, if you go into the rainforest when it is raining you will get soaked through. Water has a way of getting into everything, understanding this and knowing how to prepare for it is the key to avoiding hypothermia.
Layering properly and letting your body heat breath will keep you warm while you are moving. If it’s cold, when you stop moving or get hit by the wind is when you can get into trouble. I’ve had mild hypothermia once before and it wasn’t nice. If it wasn’t for two good friends who were able to keep me moving to out campsite, get me set up and into bed, it would have been a nasty ending.
Another thing I do is pack two sets of clothing, 1 for day use when I’m hiking and 1 for night use when I’m at camp. The reason for this is that I’m not generating heat when I’m at camp so I get cold. I always make sure I have dry, warm clothes for when I return from the days adventures. My day wear usually gets wet so I only have one set and put up with cold wet gear each morning. It isn’t pleasant to start with but once you’re moving you warm up anyway.
I recommend getting a lightweight drysac and keeping your night gear in this at all times unless you’re wearing it. Keep the dry clothes dry just in case.
HOT TIP - wear pants with a solid belt and anti chafe underwear with tight elastics. There’s nothing worse than chafe, it will ruin your trip. Another thing that drives me crazy is your pack constantly pushing your pants down if they aren’t tight enough. Make sure you’re done up tight otherwise you’ll be pulling your pants up all day and it gets really annoying.
Ps-pack some anti chafe cream just in case.
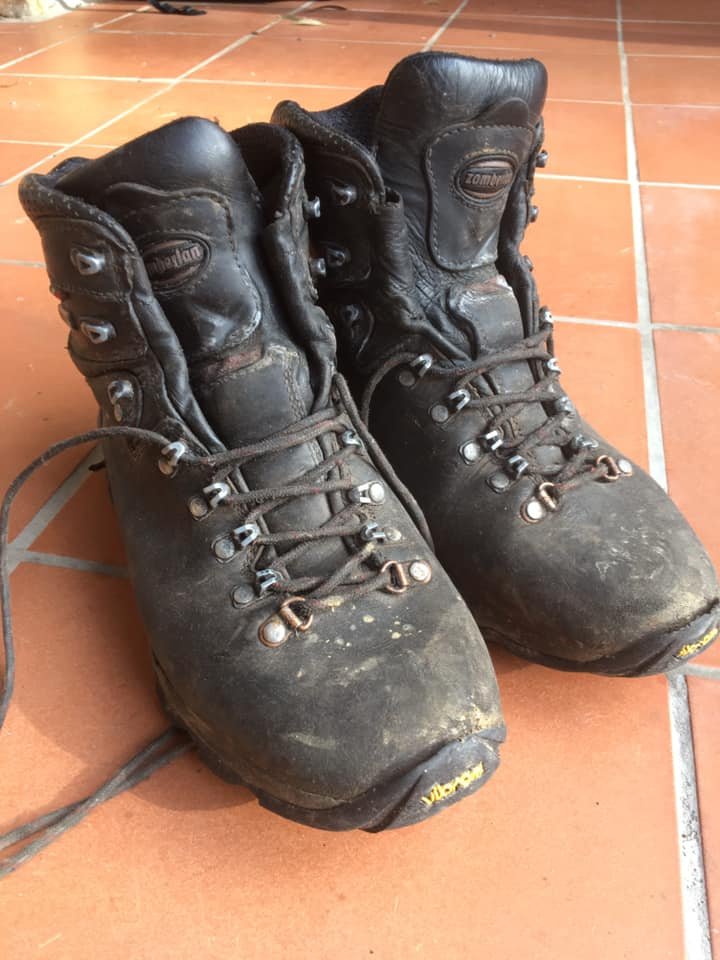
Boots - Zamberlans - These were the first type of boot I tried and I’ve stuck with them. Tasmania has a diverse range of landscapes, from the muddiest of mud pits to the sharpest of rocky outcrops and everything in between. These boots are heavy but they are solid and keep my feet protected each and every time. A pair will last years if cared for properly with good leather protection like dubbins or snowseal. That said, I often look at the lightweight Goretex options and wonder if I could shed a bit of weight, you know about it when you’ve been wearing these things for a few days.

Waterproof Socks - Dexshell - No matter what you do, if it is wet enough your feet will get wet. I tried a competitors brand of waterproof socks but found that my feet kept getting wet. I spent a bit extra and bought the Dexshell knee high wading socks, they keep me drier for longer because the cuff has a very tight seal that stops the water running down my leg from getting into the sock. I can wear these all day long and they do not come down, that means if it is not raining and the water/snow/mud I am walking through is below knee height my feet stay dry apart from sweat. However, if it rains hard enough water will run down my leg and after a while this gets into the sock causing dampness. Your feet sweat in waterproof socks of anykind and this causes dampness. At the end of the day take them off, pull them inside out and put them in a warm area to dry before the next day.
Gaijters - Sea To Summit Quagmire Canvas - I tried different brands and types of Gaijters but these ones suited the Tasmanian bush the best. You need a strong canvas that can deal with the tough scrub we have. Scoparia is a nasty little pasty when it comes to damaging equipment due to its sharp leaves. I’ve had a pair of these for gaijters a couple of years now and they are still going strong.
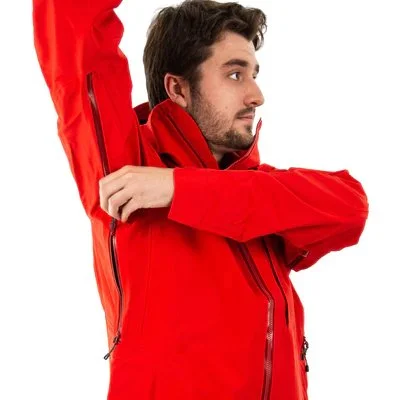
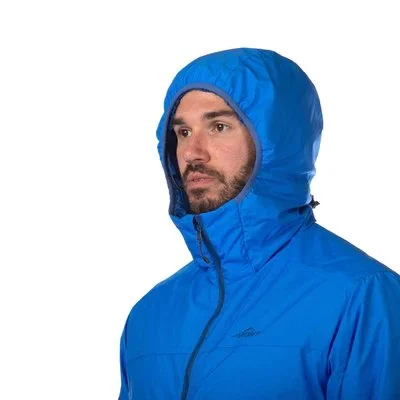
Rain Coat - Mont Odyseyy - IMHO, the gold standard of long length raincoats. Ive been in this thing all day in driving rain and I stayed pretty dry. My whole body was soaked, every part of me apart from the waist up, yes I was a little damp but this was a result of sweating. The jacket has zips on the armpits that allow you to ventilate and release body heat. For someone that sweats a bit this feature is fantastic, the only thing is that it does let some water in.
The sense of reassurance I feel when I head out into the elements wearing this jacket is priceless. At about $700 AUD they aren’t cheap but when you do this year in year out the value is realised. How much is your safety and comfort worth? If you plan on going into cold and wet conditions I recommend these highly. The Odyssey Jacket is the most advanced long-length Men's raincoat in the Mont range, check out the product description on their site and you’ll see why I chose this one for my wet weather adventures.


Waterproof Pants - This is one item I think people overlook. A pair of Mont Austral used in combination with the Mont jacket will make a day in the rain much more pleasant. I wear a pair of leggings and thermals underneath for increased mobility as they can get a bit warm and hard to move in if you wear pants as well.
Puffer Jacket - I love the Mont Guide Hoodie Primaloft - it only gets used when I’m at camp but keeps me toasty warm and is comfortable. It’s lightweight, filled with synthetic fibre which works better than down if it gets wet and packs down to a very small size. Monts Primaloft Gold 60 synthetic insulation is highly breathable, absorbs less than 1% moisture and is extremely compact. The Guide Hoodie is made with the Hydronaute XT membrane which is a waterproof rip-stop fabric. In temporary, light precipitation the Guide Hoodie will function effectively as an outer layer. Hydronaute XT fabric, as well as being waterproof, is 100% windproof.


Beanie #1 - Day use - Waterproof and windproof - Dexshell wins this one again. Such an important piece of equipment the ol’ beanie. When the majority of your body heat comes out of your noggin having it protected in harsh environments is super important. The reason I chose a Dexshell beanie was the special membrain built into the lining, it keeps my head dry and warm in the harshest of conditions. I’ve worn this thing in driving rain, snow and wind to temperatures below zero. It’s impossible to stay completely dry because water always gets in underneath the edges of garments. However, the wind chill reduction was massive and that kept me and my ears warm when I needed it most. One thing worth mentioning is that it has lost a fair bit of ‘shape’. The elastic has stretched a bit and could be stronger, when it gets wet it gets heavy and this puts strain on the fabrics.


Beanie #2 - Night use - A solid mention goes to the Headsox merino beanies. I love these for use at night or when my main beanie gets wet. They are lightweight, thin and bloody warm. Very handy for when you’re sleeping. Headsox are a great Australian company and their products are fantastic. I also use this for trail running.
Gloves - If your hands get cold and wet it really hurts. Sealskinz Anmer gloves are great in certain conditions, I even use them for trail running. They do get soaked through but there’s a good insulation in the fabric that helps keep hands warm enough. They’re also really good in the wind and that makes a big difference. Gloves are an annoying requirement in the cold when you are taking photographs because I’m always taking my hand out to shoot. When the gloves and my hand get wet I end up leaving the glove off because it’s almost impossible to get them on and off. Mittens are my preference but water can get into these pretty easy so make sure you have a tight seal around the wrist. I have a pair of mittens for sleeping in and when at camp, I use the Sealskinz when I am walking.
Thermals - I always carry two pairs. One for emergencies and at night and one for day use, if required. Merino is great but there are other polyester products that have better wicking properties. I like the Marino for night use because it’s cosy and feels nice but the thinner materials for day use. In wet environments I just wear thermals under my wet weather gear. It wicks nicely and keeps me warm, heavy layers get wet and/or cause me to sweat plus they make it harder to get around, so use the polypropylene thermals for wet conditions in the day as they dry much much quicker than merino which will never dry on a multi day, wet hike. I keep merino for dry nighttime luxury.
Neck Warmer - love this thing, when it gets windy or really cold this traps the heat coming out of my jacket. I also use it to cover my nose and face when it gets really nasty. I use it a lot.
Heating Systems
When it gets really cold you will be glad of a few little extras that keep you all snuggly at night. These can be the difference between a good night and an uncomfortable night.
Hand warmers - Ocoopa - I’m only new to this brand but I already love the product. When hands, especially my kids, get cold they start to hurt and hand warmers can be the difference between moving on or turning back. I tried single use handwarmers and they did the trick but if they got wet they were no good. I found it hard to keep them in my gloves without them dropping out and getting lost. Plus I didn’t like the whole single use thing that goes along with them.
I looked into reusable hand warmers and Ocoopa popped up, they were also looking for product testers so I jumped on board. A few adventures later I’ve been using them a lot, on my way to work, watching the kids gymnastics, at the supermarket and on hikes, basically anywhere I go that’s not heated.
They are a little heavy but I have the waterproof version and tbh the weight is not a concern when my hands are toasty warm. Lasting 6hrs on high they work a treat. I use them in my sleeping bag at night and they were fabulous! They can also double as a battery pack so if your phone runs out of charge it’s a life saver, literally. I did get one of these for free but I definitely recommend them.


Hot Water Bottle - Cost = $5 from Shiploads, Value = Priceless! Trust me on this one, get yourself a small HWB and load that up with boiling water just before you jump into your sleeping bag. Even better, put it in there for a few minutes before you jump in. Not much stays warm in the forest on a cold winters night but a HWB and an Ocoopa hand warmer strategically placed on certain areas of your body will keep you warm for about 6 hrs. You’ll thank me for this one.
WARNING - if the HWB leaks you’re screwed. It will leak into your sleeping bag and that is game over, you’re in big trouble. Be very careful with screwing the lid on properly and test that it doesn’t leak before putting it in your bag.


Slippers - I love pulling out the slippers at a mountain hut and seeing the look on peoples faces when I put them on. That’s right, comfort and warmth when it is needed most. Having warm feet at night, that’s a lovely feeling, get some.
Cooking System & Food
The Jetboil is one of my favourite pieces of camping gear. I’ve had this thing since I started and it hasn’t missed a beat. I use the flash and the only thing I would change is a swap to the smaller model. I found that most of my food only requires a small amount of hot water, all I need is enough for a coffee and a fill of my dehydrated meal. The flash is a decent size unit, not heavy at all but it takes up a bit of space in my pack. All of my hiking mates have one, you can even get a coffee plunger to go with them!
Utensils - Sea To Summits X SET is a great kit that folds down nicely, is light weight and works a treat. Simple and effective, just what we like.
Food - I like to make my own dehydrated meals and wrote an article on how you can do this easily at home. It saves a heap of money and IMO the food tastes heaps better. I like to make sure that I have enough calories to get me through a big day of exercise. Walking around the woods or hills with a pack and or camera gear will take it out of you but if your keeping up the calories you wont get as tired or lethargic. I also pack Bulk Nutrients energy powders into my water, this helps me keep up the sugars and fluids at the same time. Here’s another article on hydration & fueling.
Safety
Personal Locator Beacon (PLB) - Ocean Signal PLB1 - NEVER GO ANYWHERE WITHOUT A PLB There are a range of options, do your research and choose one that suits you. Most of all, carry it in a place that is easily accessible if you fall and break yourself.


First Aid Kit - definitely a must have. I built my own based on research and I suggest you do too. I make sure that in a waterproof bag I always carry:
Snake bite bandage, bandaids, painkillers, splinter removal tool, gauze, anti inflammatory, ibuprofen, blister pads, pocket knife, lighter, anti bac wipes, lip balm, anti chafe cream and strapping tape.
Headtorch - Fenix - HM65R-T- 1500 Lumens USB Rechargeable LED Headlamp - This thing would light up the MCG and it lasts a long time! Everyone in our family has one, the kids love them. I use it a lot for trail running because the adjuster makes it easy to tighten so it doesn’t bounce around. Check out the specs below, this thing is a beauty! I recommend getting a backup battery at time of purchase and always carry it with you.


A Garmin watch - using a GPS watch can be really handy, especially if you load the map for your planned hike/walk/run. This nifty little device saved my ass a few times. The ‘track back’ feature is great because if you go off track and get lost it will take you back to where you started, always a good thing!
Avenza Maps - GPS Maps - Another thing that has saved my skin a couple of times are breadcrumbs. These are little dots on a map that record where you have been. If you head into the bush regularly there will come a time when you get lost. A great way to find yourself again is to backtrack until your at the last track marker. I use these 2 different tools to track myself. Both are great because you can not only track your progress but also load GPX files from people who have been there before, this will help you find your destination and give you great peace of mind. The Garmin is also good because I get a distance and elevation report at the end of the walk.
MAKE SURE you carry backup power. Using these features chews the juice, especially in the cold. Pls see below for power pack recommendations.
Jupio Powervault DSLR - Using all these electronic safety devices means you must carry backup power. Cold temperatures will drain the lifeforce out of you and your devices. I always try to carry two of these just in case. It’s a pain in the arse having leads and stuff but recently I was deep in the forest when my phone decided to loose charge quickly and without a power source to fix it I would have been in a spot of bother.
Get them, charge them and carry them. Ps - don’t forget the cables.
Kahtoola Micro Spikes - Ice is damn slippery and if you don’t want to end up doing the moonwalk like Michael Jackson and fall flat on your face then these are a must. It’s also very hard to go anywhere icy and slippery unless you have them, you can do it but the risk of slipping over with a heavy pack on and doing yourself a mischief is greatly increased.
Poles - I like them but rarely use them because they seem to get in the way. Its a personal preferrence.
HOT TIP from my friend and extremely knowledgeable outdoors person, Nicole Anderson - ‘I would encourage people to have laminated paper maps & compass & know how to use them. One problem with app based navigation is they can rapidly drain your phone batteries, then you don’t have a map app or a phone. Backup power is essential but itself not foolproof. Having a stand alone gps solves this but is another bit of kit, but most of my hiking I’ve used a Garmin GPS map.’
Caring for your equipment
Once you have invested a lot of money into your equipment the next thing you need to be aware of is how to care for it. Each item has different needs and if you don’t take the proper precautions you can destroy something very quickly. Take tents for instance, if these are not dried properly and you get mold or rot in the seams it will fall apart.
The big piece of advice I can offer is to do it as soon as you get home. Pull it all out, hose it down, wash it off and dry it. If you leave it in your pack then it becomes harder and harder to get it done as the days go by. You’ll be tired and won’t feel like it but the extra effort will be worth it in the long run.
Here are some guides on how to look after your gear:
Disclaimer - These are my opinions only, I take no responsibility or give any guarantees that this equipment will do for you what it did for me. Do your own research before making a purchase decision. It is not my intent to sway your decisions. I want to offer my opinions based on the experiences I have had with my equipment. I may be biased and I have received a discount on some items. However, I only give my honest opinions and wouldn’t recommend something unless I had a good experience with it. Do your own research.
I hope this info helps, it took bloody ages to write but I think it was worth it. Happy travels team, venture far and wide but stay safe.

Things can get a bit cluttered at times but it’s a nice feeling when you have everything you need..